How to Make a Beauty Gift Bouquet
How to Make a Beauty Gift Bouquet
DIY Gift Guide · Beauty Bouquet
How to Make a Blush Pink Beauty Gift Bouquet
A step-by-step guide anyone can follow — no florist skills needed, just a few beauty products and about 75 minutes.
🎀
What Is This Bouquet?
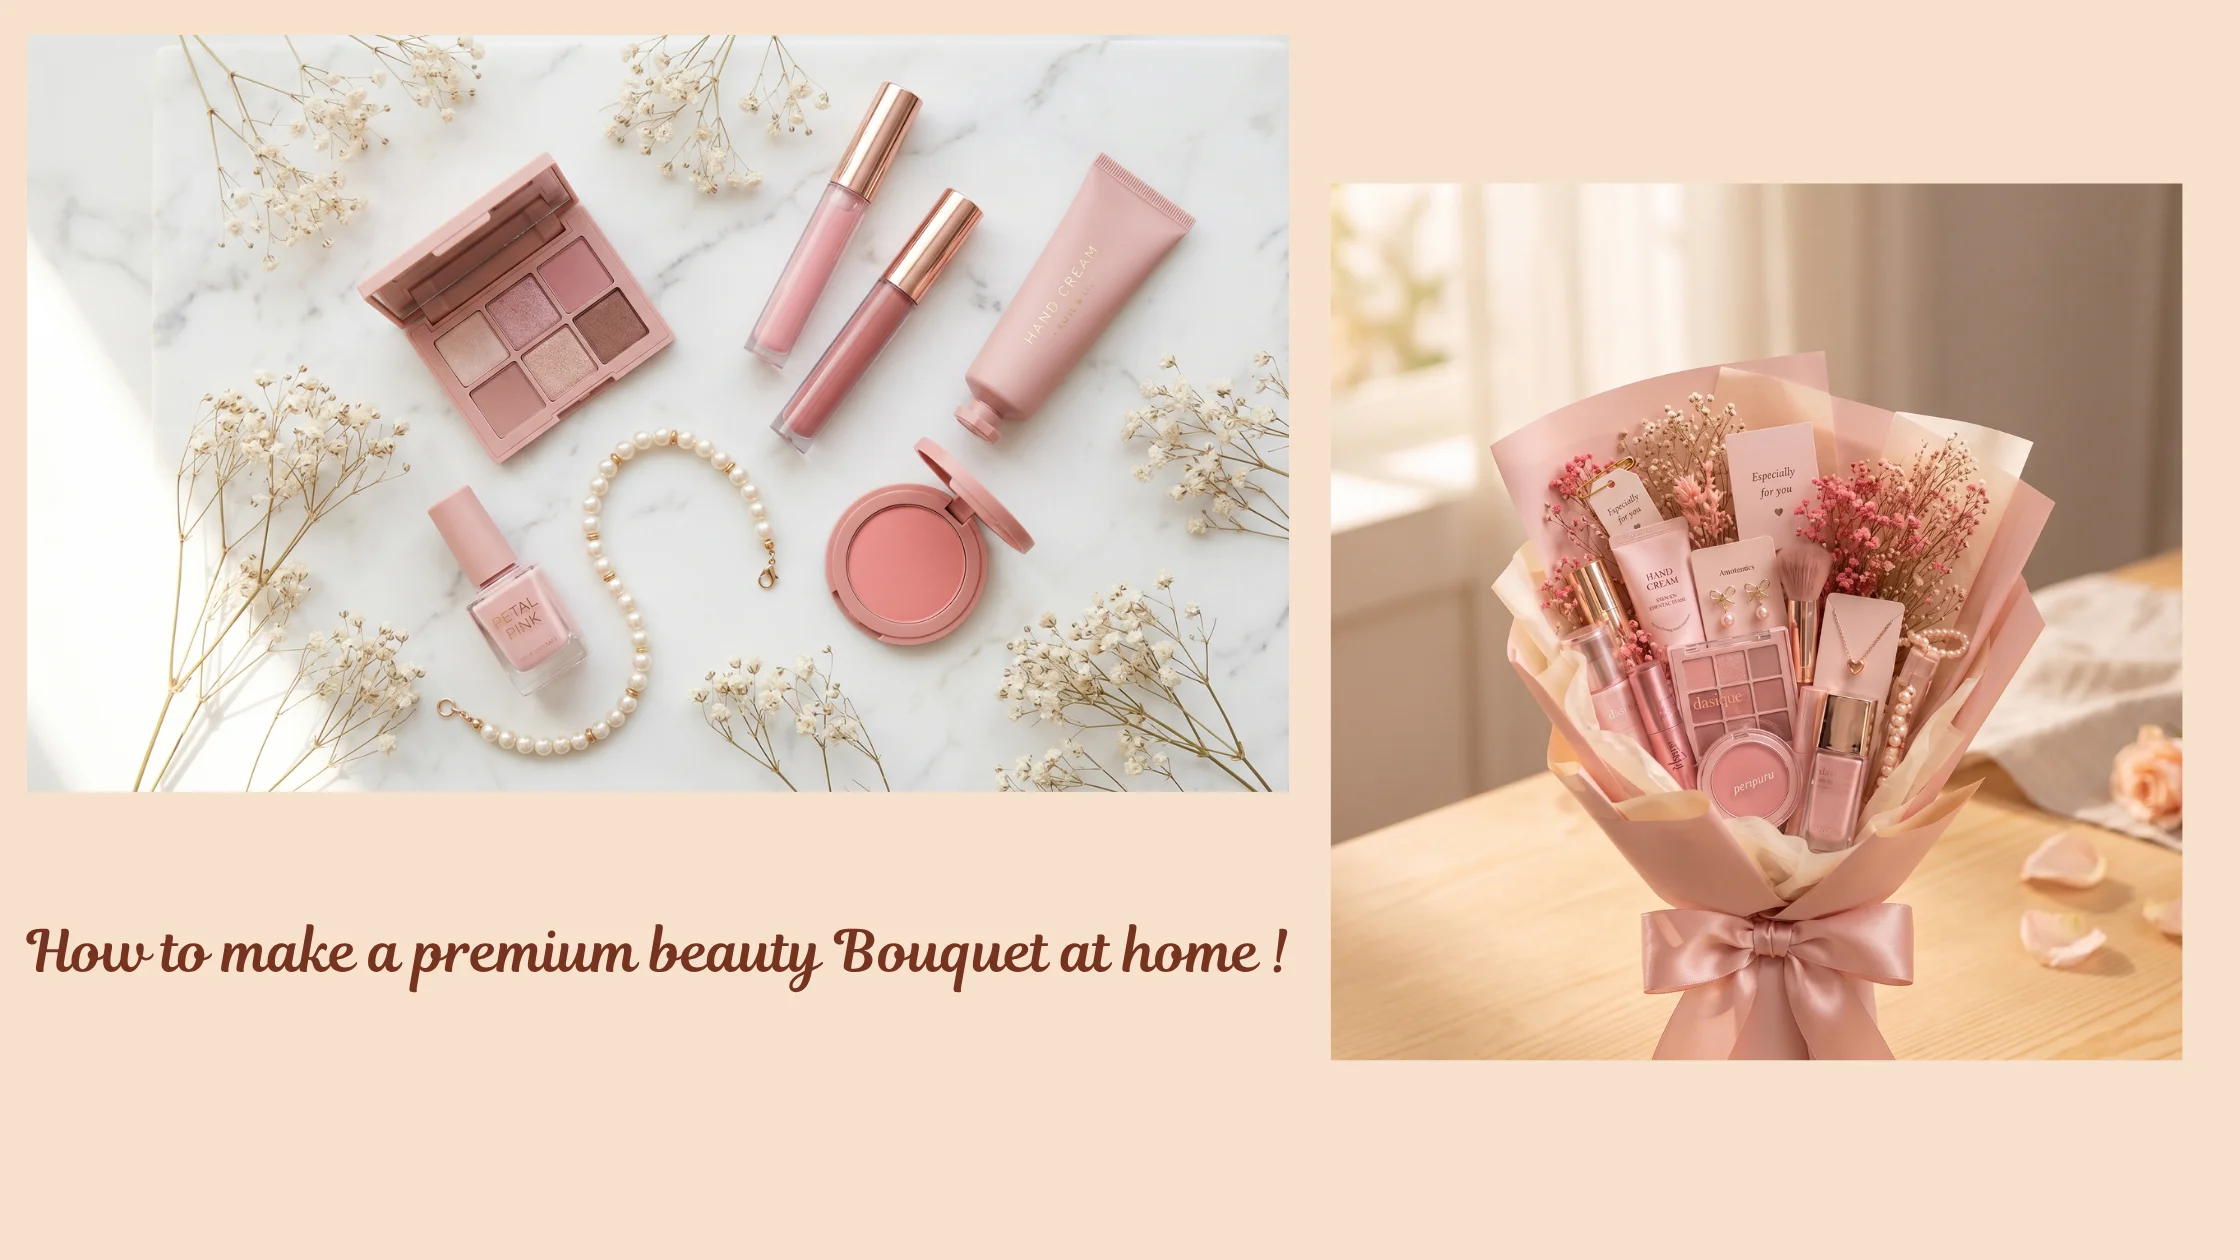
A beauty gift bouquet is exactly what it sounds like — skincare and makeup products arranged to look like a real flower bouquet. Products get wrapped individually in tissue paper, tucked around dried flowers, and tied together with a big satin bow.
The version in this guide is the blush pink self-care kit style. Everything is pink, cream, or dusty rose. It has a dreamy, Korean aesthetic feel — soft, feminine, and highly giftable.
The best part? It looks expensive but costs around $45–$130 to make yourself, depending on the brands you choose. And it photographs beautifully for social media.
Best Occasions to Give It
It works best as a gift for women and teenage girls. It’s personal, visual, and feels much more curated than a gift bag or box.
- 💝 Valentine’s Day
- 🎂 Birthday
- 🌸 Mother’s Day
- 🎓 Graduation
- 💍 Bridal Shower
- 👯 Bridesmaid Gift
- 🤍 Just Because
- 🛁 Self-Care Sunday
What You’ll Need
Stick to one color family — in this case, all things blush pink or cream. That’s the single rule that makes the bouquet look professional.
Total Cost Approximately $45–$135 depending on product brands.
|
Item |
Role in the Bouquet |
Estimated Cost |
|
Flat centerpiece, anchors the arrangement |
$8–$25 |
|
|
Tall, slim products that stand like flower stems |
$5–$15 each |
|
|
Adds height and texture in the mid-row |
$5–$20 |
|
|
Round shape adds variety to the arrangement |
$8–$20 |
|
|
Small pops of color at the front |
$3–$10 |
|
|
Draped at the top for a delicate finishing touch |
$3–$15 |
|
|
Dried baby’s breath or pink statice |
Natural filler that softens the whole look |
$3–$8 |
|
Blush pink tissue paper (4–6 sheets) |
Individual product wrapping + outer cone wrap |
$3–$5 |
|
Cream tissue paper (2–3 sheets) |
Inner layer for depth and contrast |
$2–$4 |
|
Blush satin ribbon (~80 cm) |
The final bow — makes it gift-ready |
$2–$5 |
|
Wooden skewers or bamboo sticks |
Stems for flat products like the palette |
$2–$3 |
|
Floral tape |
Binds everything together, hides the mechanics |
$2–$3 |
|
Small gift tag (optional) |
“Especially for you” tag tucked into the wrap |
$1–$2 |
Quick Reference
|
Color palette |
Blush pink + cream + dusty rose |
|
Aesthetic style |
Korean soft aesthetic |
|
Skill level |
Beginner-friendly — no experience needed |
|
Time needed |
60–90 minutes |
|
Filler flowers |
Dried baby’s breath or preserved statice |
|
Best product shapes |
Tubes, bottles, flat palettes, round compacts |
Step-by-Step Instructions
1
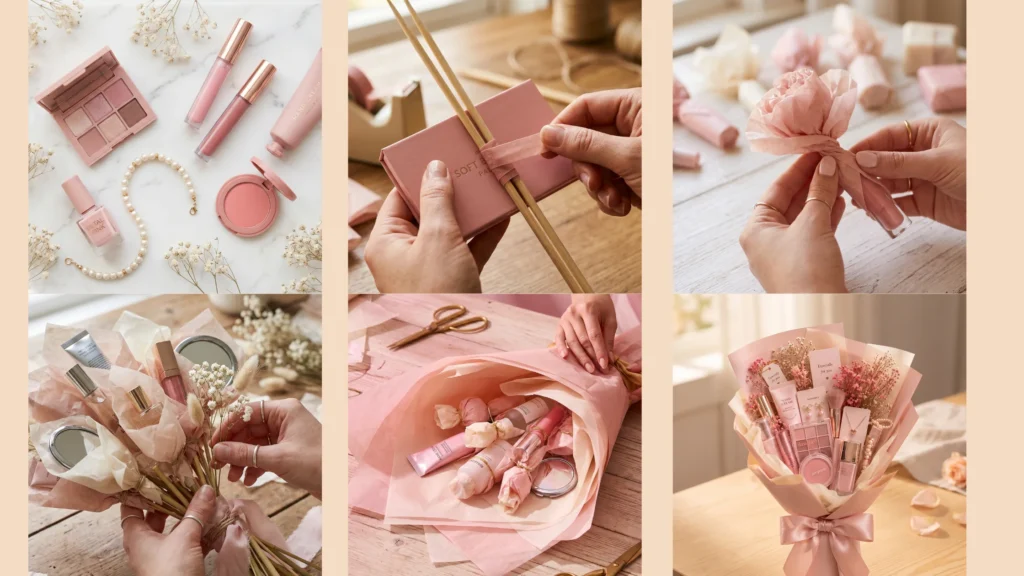
Gather Everything and Lay It Out
~10 minutes · No tools needed yet
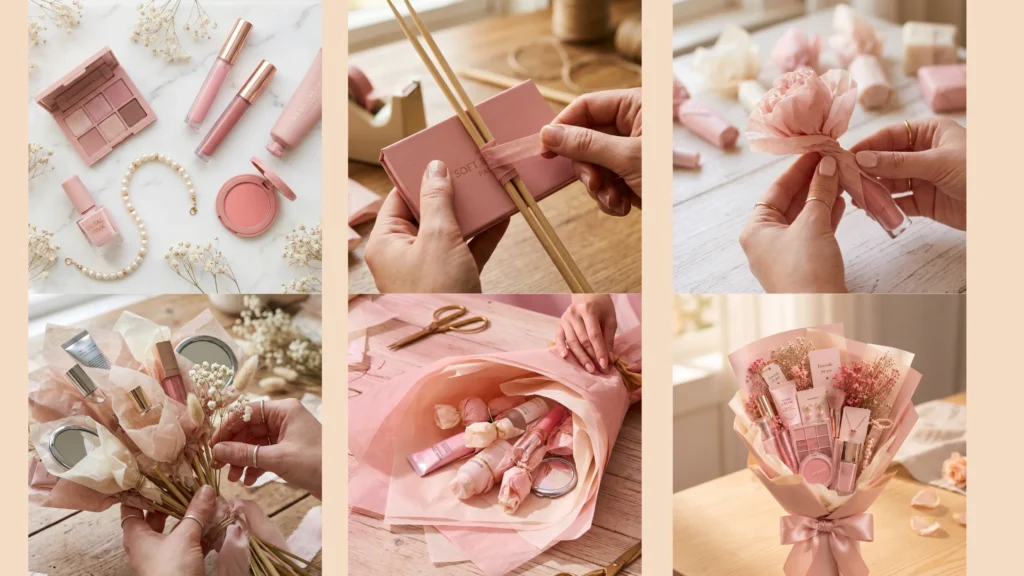
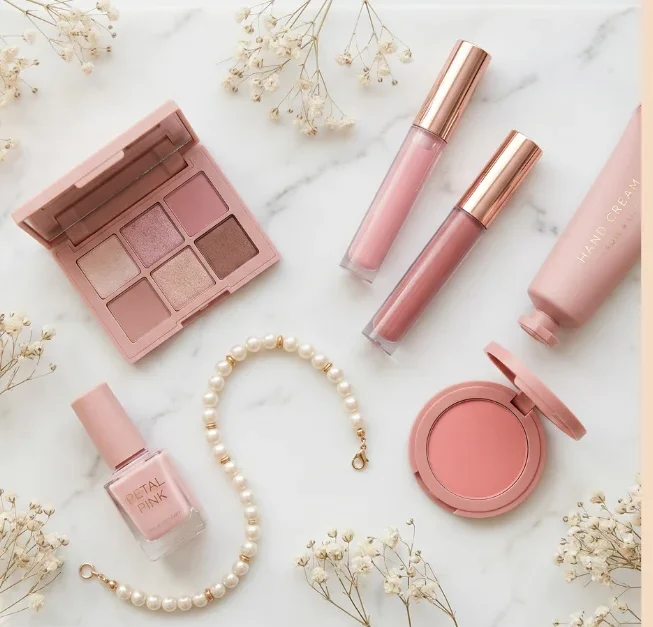
Before you wrap anything, put all your products on a flat surface. Group them by height: tall items (sprays, glosses, tubes) in one group, flat items (palettes, compacts) in another.
Double-check your color palette. Every product in this bouquet is some shade of pink, blush, or cream. If something looks too different, swap it out now — it’s easier to fix this at the start than once everything is wrapped.
👁 Color Rule: Hold everything together in your hand for 10 seconds. Does it look like one gift set? If yes, you’re good. If one product sticks out, replace it.
2
Create Stems for Flat Products
~10 minutes · Skewers + floral tape
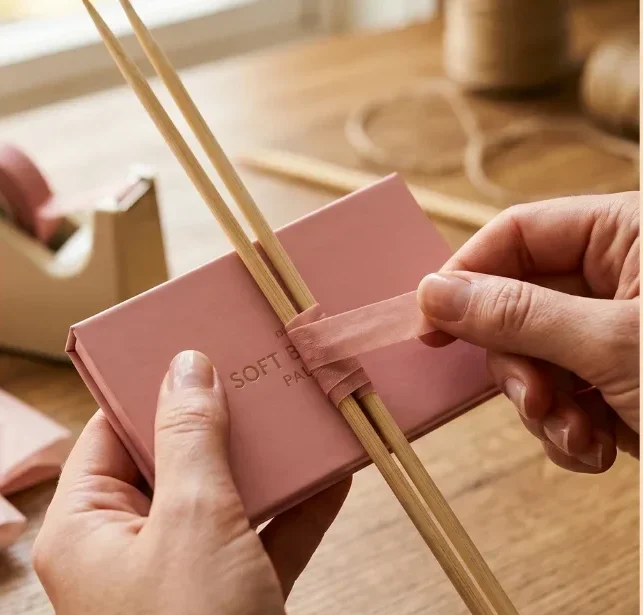
Flat products like eyeshadow palettes and round compacts can’t stand up in a bouquet on their own. You need to give them a stem.
Tape one or two bamboo skewers vertically to the back of each flat product using floral tape. Wrap firmly, overlapping as you go. The stick needs to support the weight of the product.
|
Product |
Needs a Stick? |
|
Lip gloss / lipstick tube |
❌ Already has a tall shape |
|
Eyeshadow palette (flat square) |
✅ Tape 2 skewers to the back |
|
Hand cream tube |
❌ Stands on its own |
|
Nail polish bottle |
❌ Bottle shape is fine |
|
Nail polish bottle |
✅ Tape 1 skewer to the back |
3
Wrap Each Product in Tissue Paper
~20–25 minutes · The most important step
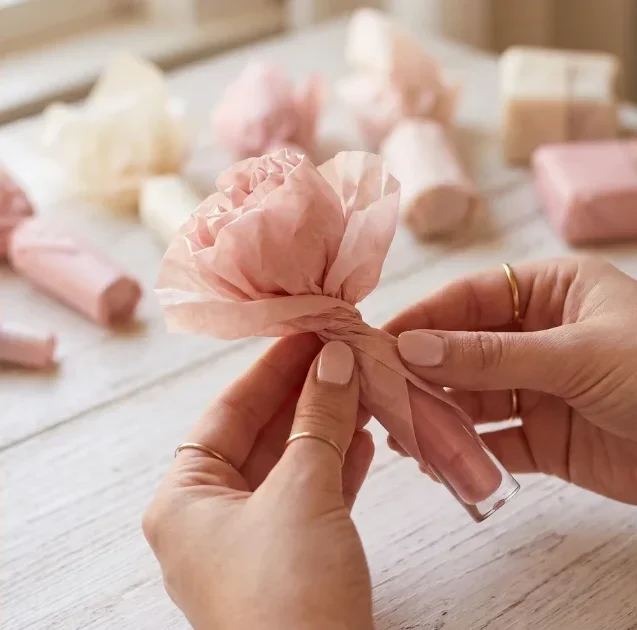
- This is what separates a beautiful bouquet from a messy one. Every single product gets individually wrapped before it goes into the arrangement.
- Cut a square of tissue paper, roughly 10–12 inches on each side.
- Place the product face-up in the center.
- Gather the tissue paper upward from all sides, letting it puff loosely at the top.
- Twist the bottom tightly, like a candy wrapper, and secure with a small piece of tape.
- Fan out the top edges so they look like flower petals.
🌸 Layering Tip: Alternate blush pink and cream tissue paper as you wrap different products. The contrast between the two colors is what gives the bouquet depth and a designer feel.
4
Build the Bouquet Shape
~15 minutes · Hold and layer
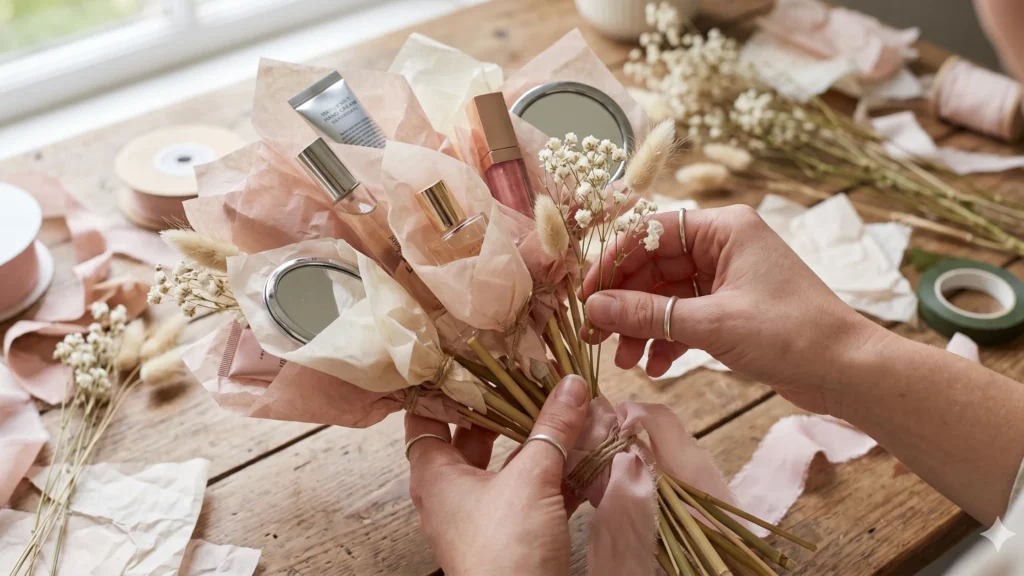
Hold your tallest item — usually the perfume, body mist, or hand cream tube — in your non-dominant hand. This is your centerpiece. Everything else gets built around it.
|
Position |
What Goes Here |
|
Center back |
Tallest product (mist, spray, tall gloss) |
|
Middle ring |
Palette, hand cream, second gloss |
|
Front low |
Compact, nail polish, short items |
|
Scattered throughout |
Baby’s breath and dried flower stems |
Add one product at a time. Rotate the bouquet as you go so it looks full from all sides. Tuck in baby’s breath stems in every gap — this is what fills out the silhouette and makes it feel like a real floral bouquet.
Wrap the handle area with floral tape as you add each piece — keep adding tape every time the bouquet grows.
5
Wrap the Whole Bouquet
~10 minutes · Outer cone wrap
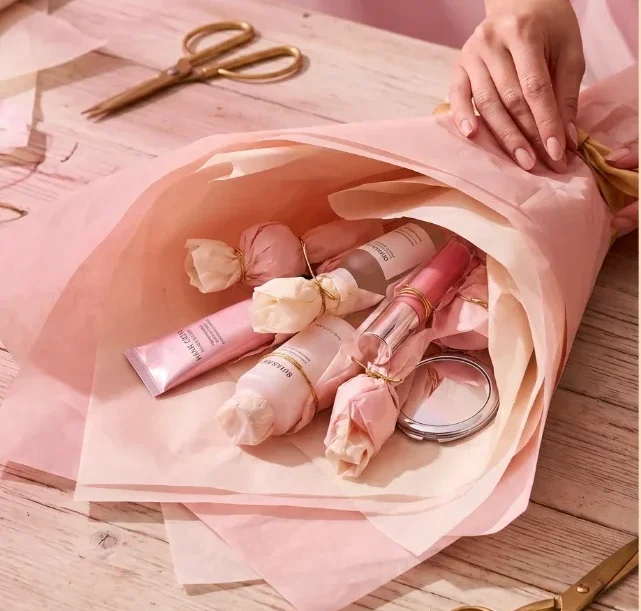
Once your bouquet is fully assembled and taped, it’s time to wrap the outside — the same way a florist would wrap a real flower bouquet.
- Lay 2–3 large sheets of blush pink tissue paper flat on a table, slightly offset from each other so the layers fan out.
- Place one or two sheets of cream tissue underneath for contrast.
- Lay the bouquet face-down in the center of the layered sheets.
- Bring the bottom up and wrap the tissue around the sides, forming a cone shape.
Secure around the handle with floral tape. - Fan out the top edges of the tissue so they frame the products like a flower bed.
📐 Shape Check: Look at the bouquet from the side. It should look like a cone — wide at the top where the products are, and narrow at the handle. Adjust the tissue until you get this shape.
6
Tie the Bow and Add Finishing Touches
~10 minutes · The final reveal
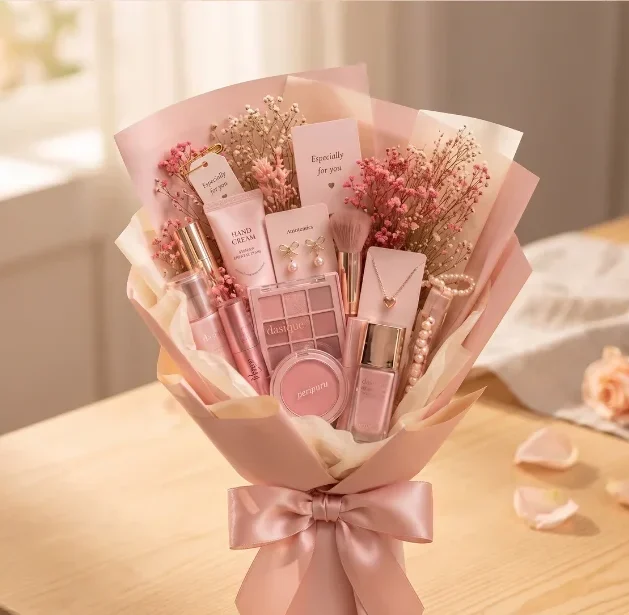
Cut about 70–80 cm of satin ribbon. Wrap it once around the handle and tie a generous double bow. Fluff out the bow loops with your fingers until they look full and round — not tight and flat.
Now the details that take it from nice to stunning:
- Drape a pearl bracelet or small necklace at the top of the bouquet.
- Tuck in a small handwritten “Especially for you” tag.
- Add a few extra baby’s breath stems right at the front so they peek over the tissue.
- Use your fingers to fan out any tissue paper edges that flattened during wrapping.
6 Tips for a Better Bouquet
🎨 One color family only
All products should be shades of pink, blush, or cream. Nothing bright red or orange. This is the single most important rule.
📏 Vary the heights
Short, medium, and tall products at different positions make it look like a real bouquet — not a flat grid.
🌿 Don’t skip the flowers
Dried baby’s breath fills in gaps and adds a softness that tissue paper alone can’t give. Even a $4 bunch is enough.
🎀 Big bow, full loops
A flat, tight bow looks cheap. Fluff the loops wide and make sure the ribbon has some volume. Use satin, not plain string.
🔒 Tape tight at the base
Wrap the handle with floral tape at every stage of building, not just at the end. A loose base causes everything to shift and fall.
📸 Photograph before gifting
This bouquet photographs beautifully. Place it near a window in natural light before you give it away and take a few photos.
Time Breakdown
|
Task |
Estimated Time |
|
Gathering and color-checking products |
10 min |
|
Making stems for flat products |
10 min |
|
Wrapping each product individually |
20–25 min |
|
Building the bouquet arrangement |
15 min |
|
Outer tissue cone wrap |
10 min |
|
Bow and finishing touches |
10 min |
|
Total |
~75–80 minutes |
You’ve got everything you need. 🎀Come back to this guide every time you make one — the steps work for any season, any color palette, any occasion. Just keep the tissue paper, the flowers, and the big bow.